
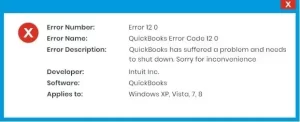
Has QuickBooks Error 12 0 knocked down your application and disrupted its operation? In such instances, having a convenient detailed guide including every detail regarding the problem is critical. That is why we are giving you this in-depth article with the reasons and remedies for the mistake, which will assist you in a short period.
Every application that runs on Windows requires adequate authorization and administrative permissions to accomplish any operation. If the program does not have permission to access system resources, it will face issues. QuickBooks is a large application that requires permission to access most Windows components. QuickBooks Error Code 12 0 arises when QuickBooks does not have administrative privileges on Windows. Read the entire article for detailed troubleshooting information.
What causes QuickBooks error code 12,0?
Several circumstances might cause the following error. These factors include:
- Missing from the registry or removal might be one of the most crucial causes.
- Another explanation might be a fault in the system.
- The user may also encounter this problem if erroneous entries are present.
- A corrupted Windows registry might potentially cause this issue.
- If the program isn’t correctly installed, you can encounter this difficulty.
What causes the QuickBooks error code 12,0?
There are several variables that might cause the following error to occur. These elements include:
- Missing from the registry or removed might be one of the most crucial causes.
- Another explanation might be a system problem.
- The user may also encounter this problem if erroneous entries are present.
- A corrupted Windows registry might potentially cause this issue.
- If the software itself isn’t installed properly, you can encounter this difficulty.
Effective approaches to address the issue
Procedure 1: Use the Scan Now command
Using the scan now command will scan the system for garbage files and, to some part, resolve the issue. The actions to take here are as follows:
- First, select the Start tab.
- Now, navigate to the Search box and type ‘Command’.
- Click the Enter key.
- Press and hold the Ctrl + Shift keys.
- Hit the Enter tab.
- This will launch the permission dialogue box.
- Select the Yes tab.
- Now a black box with a flashing cursor will appear on the screen.
- Type ‘SFC/scannow’ and then click the Enter tab.
- This will check for faults and other system file problems.
- Follow the steps that appear on the screen.
Procedure 2: Update Windows
- Click on the Start tab.
- After that, put Update in the Search field and click the Put tab.
- This will display the Windows Update dialogue box on the screen.
- Click the Install Updates tab to complete the procedure.
- Step 3: Enable the QBdatabaseserviceuser23 service.
- Under this procedure, you must first verify the QuickBooks version.
- When entering QuickBooks, navigate to Services and choose QBDatabaseserviceuser23.0.MSC
- Check to see if the given service has been discontinued or continues to operate.
- Now press QBdatabaseserviceuser23.
- Additionally, right-click QBdatabaseserviceuser23.
- After that, go to the Properties tab.
- If the service has stopped operating, be sure to choose the Start service option.
- Finally, reopen the business file and check to see if the mistake was corrected.
- Check permissions on the folder containing the business file by following the procedures below:
- You need to right-click on the Client data and choose Properties.
- Now choose the Security tab.
- Also, make sure you have permission to view the file.
- If you don’t have permission to access the folder, obtain it and try opening the company file again.
Procedure 4: Select System Restore
- First, click the Start tab.
- Also, put System Restore into the search box.
- Select the Enter tab.
- In the results section, click the System Restore tab.
- Enter administrator passwords.
- Complete all of the wizard’s steps to select a Restore point.
- Finally, restore the system and begin working with QuickBooks.
Procedure 5: enable permissions
- Here, right-click the Client data option.
- Select the Properties tab.
- Additionally, click on the Security tab.
- Check whether you have permission to view the file.
- If not, provide the required permission.
- Now, open the company file and check whether the issue is corrected or not.
Procedure 6: Update the QuickBooks version
The user might try to update the QuickBooks desktop by following the instructions below.
- The first step is to launch the QuickBooks desktop and navigate to the help menu.
- Furthermore, click Update QuickBooks Desktop.
- Then, click on the option to update immediately.
- The updates will then begin to download if you check the “reset updates” box and select the “get updates” tab.
Conclusion!
We’ll finish this chapter with the hope that the procedures described above will help you repair QuickBooks problem code 12,0. If you continue to encounter identical difficulties over and over, please contact our technical staff.
Read more helpful articles here:
How to Fix QuickBooks Error Code 2501


